
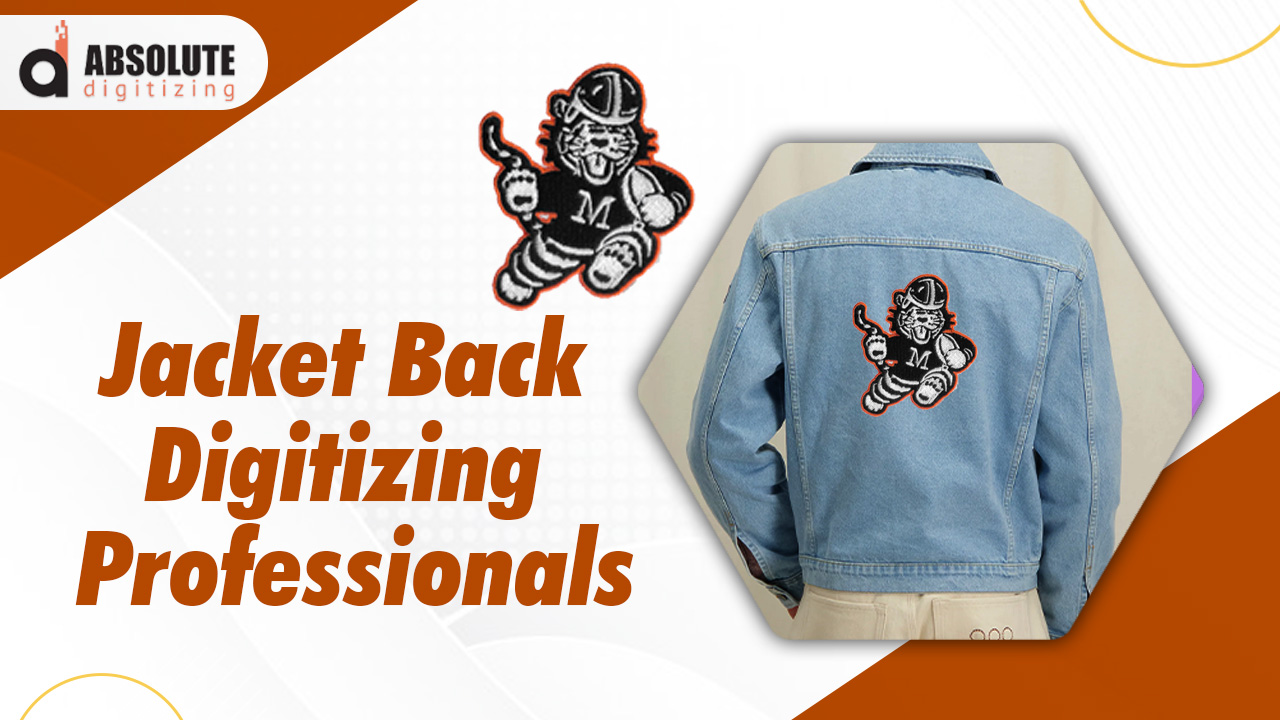
Achieving Flawless Jacket Back Embroidery Digitizing A Step-by-Step Guide
Introduction to Embroidery Digitizing
Embroidery digitizing is the process of converting artwork into a digital file that an embroidery machine can read. This file guides the machine on how to stitch the design onto fabric. In this guide, we will explain the process and benefits of jacket back embroidery digitizing.
Importance of Quality Digitizing
High-quality digitizing ensures that the embroidery design is executed accurately, with clean lines and detailed patterns. Poor digitizing can lead to distorted images and uneven stitching, which detracts from the overall appearance of the jacket.
Tools and Software for Digitizing
Professional digitizing requires specialized software and tools. Popular software options include Wilcom, Hatch, and Brother PE-Design. These programs offer advanced features that allow for precise control over the digitizing process.
Preparing Your Design for Digitizing
Choosing the Right Artwork
The quality of the final embroidery heavily depends on the initial artwork. Choose high-resolution images with clear details. Vector files are preferred as they can be scaled without losing quality.
Simplifying Complex Designs
While intricate designs are attractive, they can be challenging to digitize. Simplify complex elements to ensure that the embroidery machine can replicate the design accurately.
Considering Fabric Type
Different fabrics react differently to embroidery. Consider the type of fabric the jacket is made from when preparing your design. Some fabrics require additional stabilization to prevent distortion.
Step-by-Step Guide to Digitizing Jacket Back Designs
Step 1: Importing the Design
Begin by importing your chosen design into the digitizing software. Ensure the image is high-quality and appropriately sized for the jacket back.
Step 2: Setting the Stitch Type
Different parts of the design may require different stitch types. Use satin stitches for borders and fills for larger areas. Adjust the stitch density to suit the fabric and design complexity.
Step 3: Creating a Path
Define the stitching path to determine the order in which the machine will stitch the design. Efficient pathing reduces thread breaks and improves the overall appearance of the embroidery.
Step 4: Adding Underlay
Underlay stitches provide a foundation for the top stitches, ensuring the design remains stable on the fabric. Choose the appropriate underlay type based on the fabric and design.
Step 5: Adjusting Tension and Density
Fine-tune the tension and stitch density to match the fabric’s characteristics. Too much tension can pucker the fabric, while too little can result in loose stitches.
Common Challenges in Jacket Back Embroidery Digitizing
Managing Large Designs
Jacket backs often feature large designs, which can be challenging to digitize and stitch. Break down the design into manageable sections and ensure proper alignment.
Dealing with Thread Breaks
Frequent thread breaks can disrupt the embroidery process. Ensure the design has smooth transitions and avoid sharp angles that can cause thread tension issues.
Ensuring Consistency
Consistency in stitching is crucial for a professional look. Regularly check the machine’s settings and the quality of the stitches throughout the digitizing process.
Tips for Perfect Jacket Back Embroidery
Use High-Quality Thread
High-quality thread reduces the risk of breaks and ensures a smooth finish. Choose threads that match the colors in your design for a cohesive look.
Stabilize the Fabric
Stabilizers are essential for preventing fabric distortion during embroidery. Choose the right stabilizer based on the fabric type and the complexity of the design.
Test Your Design
Before embroidering the final jacket, test the design on a similar fabric. This allows you to make necessary adjustments to the digitizing file.
Advanced Techniques in Embroidery Digitizing
3D Puff Embroidery
3D puff embroidery adds dimension to your design, making it stand out. This technique is popular for jacket backs as it creates a bold and impactful look.
Applique Embroidery
Applique involves stitching fabric pieces onto the jacket, which can add texture and color variation. This technique is useful for large designs where full embroidery would be too dense.
Gradient and Shading Effects
Advanced digitizing software allows for gradient and shading effects, adding depth to the design. Use these techniques to create realistic and visually appealing embroidery.
Choosing the Right Digitizing Service
Evaluating Experience
Choose a digitizing service with extensive experience in jacket back embroidery. Experienced digitizers understand the nuances of large designs and different fabric types.
Reviewing Portfolios
Examine the portfolio of the digitizing service to assess the quality of their previous work. Look for clean stitching, accurate representation of the design, and consistency.
Considering Turnaround Time
Timely delivery is crucial, especially for bulk orders. Ensure the digitizing service can meet your deadlines without compromising on quality.
Conclusion
Achieving flawless jacket back embroidery digitizing requires a combination of quality artwork, precise digitizing, and attention to detail. By following the steps outlined in this guide and employing advanced techniques, you can create stunning embroidery designs that enhance the overall appeal of jackets. Whether you’re a professional embroiderer like Absolute Digitizing or a hobbyist, mastering the art of digitizing will elevate your creations to new heights.